Curtains can add a fun flare to any room, and with this inexpensive trick, anyone can pull it off. Not only can you be sure that your curtains are wool-free if you DIY, you’ll also save some money and give your home a mini-makeover. The best part: No sewing machine required!
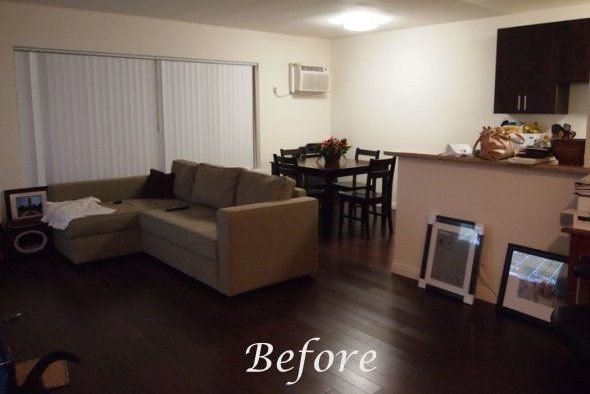
Now, before we begin, let’s take a look at what my living room looked like prior to my DIY project:

Get Your Measurements
Before you head to the store, be sure to measure the size of your window.
Let’s Go Shopping
After you’ve got your measurements marked down, you’re ready to go shopping! Check out local discount stores for the best deals, such as T.J. Maxx, Ross, and HomeGoods, and scout out curtain rods with decorative ends. I was able to score mine for less than $15!
Next, head on over to the bedding aisle, and find a color (or print) that you like—in bed sheets. You’ll have to find two of the same set, in the same size, because we’re going to turn the flat sheets into curtains! (If you’re worried about what you’ll do with the fitted sheet and pillowcases, some stores sell flat sheets by themselves. I just saw them at IKEA for $7 each in just about every color imaginable!)
Time to Decorate
Once you’ve got your materials, you’re ready to start decorating! Just remove the flat sheets from the packaging and carefully undo the seams at the two top corners of the fabric (this is where the rod will slide through). You’ll need to iron those bad boys to get them looking good, and then you’re good to go!
The Handy Work
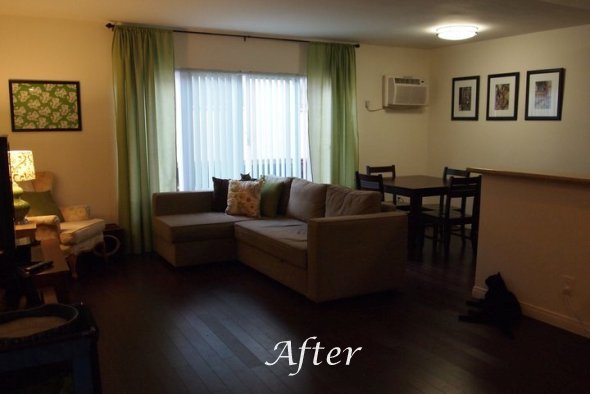
I don’t have an electric drill, so my dutiful husband used a screwdriver to manually insert the screws for the curtain rod (what a trooper!). I placed my curtain rod very close to the ceiling; this gives the illusion of a bigger space, and it also eliminated the need to have to hem the curtains! If your curtains are a bit long and you don’t like the “puddled” look, consider buying some hemming tape at your local craft store.
Once you’ve got your rod in place, you can slide on your new “curtains” and call it a day! Now sit back, relax, and enjoy your “new room,” courtesy of your hard work and creativity.
Just take a look at the difference these curtains (and a bit of simple artwork) made to my living room:

Do you have any animal-friendly, DIY home improvement tricks up your sleeve? Share them in the comments below!
Text VEG to 73822 to get the latest vegan lifestyle tips, recipes, and urgent action alerts texted right to your phone.
Terms for automated texts/calls from PETA: https://peta.vg/txt. Text STOP to end, HELP for more info. Msg/data rates may apply. U.S. only.


